Switching Servers

Contents
The system is able to provide access to alternative data servers. Sometimes when one server is unavailable or when you are directed to do so, you may need to switch from one data server to another. The steps below detail this process.
If you are already connected and you are being asked to switch your server: First close all floating windows and return the application to the Cost Monitor page.
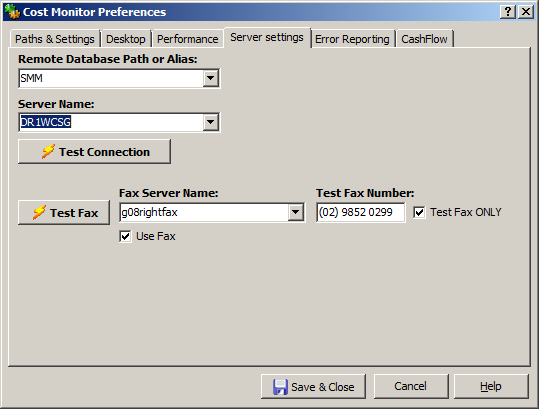
Open Preferences|Server Settings and drop the Server Name selection box. Select an alternative server. For CM, DR1WCSG should be the default server from both the desktop and from Citrix operation. DC1WCSG can be used in an emergency |
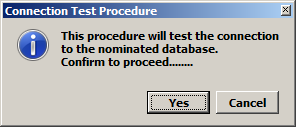
Once the new server is selected, click the Test Connection button. The Cost Monitor form will close in the background and you will be advised that a test will be carried out to ensure the new server is, in fact available. Click Yes to continue and logon in as you would normally. |
|
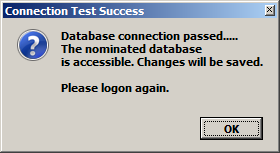
If unsuccessful, you will be warned that the server is not available. If the server is available you will be notified with the message shown here.
You must now log in again to make the change permanent for the session.
Once you have logged on, Save & Close the Preferences form and click Open Project to re-open your selected project.
|
|

If you cannot connect to your default server due to system failure:
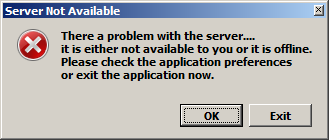
If you cannot start a new session because the default server is unavailable, then slightly different steps are required to remedy the situation.
You will be met with the error message shown here.
Click Exit ONLY if you want to cease your attempt to logon.
Click OK to keep trying.
|
|
Cost Monitor will open with a blank page and from this point you should proceed by opening Preferences|Paths & Settings and continue with the steps shown in the first part of this section. |
|