New Invoice

Contents
 After locating the relevant job, a new invoice can be created in one of three ways:
| • | Clicking on the New Invoice Button |
| • | Using the popup menu "New Invoice" option, or |
| • | Using the keyboard shortcut F6 |
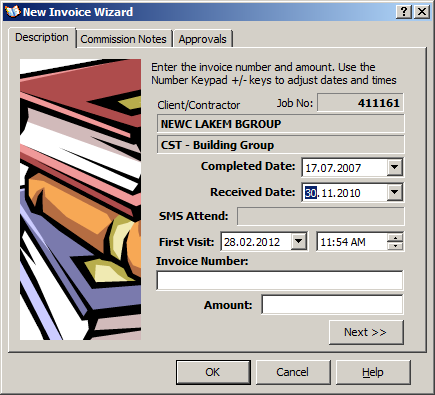
The New Invoice Wizard will open as shown. For confirmation purposes, the Job number, Client and contractor is shown and the focus is placed on the Invoice Received Date field. If the job has not yet been declared completed, the focus will be on the Job Completed Date.
Use the +/- keys on the number keypad to adjust the date field values. During any session of invoice entry, the invoice date is remembered between invoice entry operations. Manually sort the paper invoices to be entered, into date order to make invoice entry much faster.
The First Visit entry is broken into separate Date and Time fields. Use the arrow keys to move between day, month etc and +/-keys to adjust the field values.
The Invoice number field is a free form edit field since invoice numbers can be any combination of alpha-numeric characters.
The amount is the invoice total as provided by the contractor. Do not, at this stage attempt to check the correctness of the total. The total of the line items of the invoice (docket) will either equal the submitted amount - or it will differ, in which case a discrepancy of the submitted amount will be exposed.
Click the Next button to enter commission notes from the Docket which describe the work actually carried out. The content of these notes are subject to live spell checking.
Click the OK button to insert the new invoice against the selected job.